Daikin Air Conditioner Remote Control Manual: A Comprehensive Guide
Unlock the full potential of your Daikin system! This guide provides detailed instructions, from initial setup to advanced features, ensuring optimal comfort and efficiency.
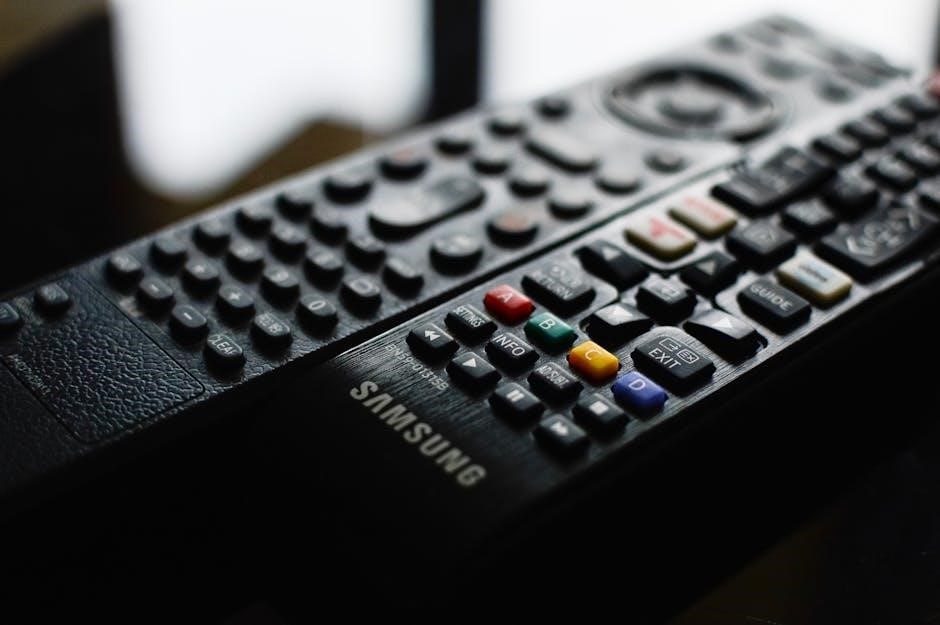
Daikin remote controls are engineered for intuitive operation and precise climate management within your home or office. These devices serve as the primary interface for controlling Daikin air conditioning systems, offering a wide array of functions beyond simple temperature adjustments. Understanding your remote’s capabilities is key to maximizing energy efficiency and personal comfort.
Modern Daikin remotes, like the BRC1D61, boast user-friendly designs and advanced features such as programmable timers, energy-saving modes, and smartphone connectivity. This manual will guide you through the specifics of your remote, ensuring you can effortlessly navigate its settings and enjoy a perfectly conditioned environment. Proper utilization extends the lifespan of your AC unit and reduces energy consumption.
Understanding Your Daikin Remote Model
Daikin offers a variety of remote control models, each tailored to specific air conditioner units and feature sets. Identifying your exact model – often found on the remote’s back or within the battery compartment – is crucial for accessing the correct documentation and support. Common models include the BRC1D61 and variations designed for different Daikin systems.
Each model possesses a unique layout and functionality. Some remotes feature larger displays, more programmable settings, or compatibility with Daikin’s smartphone app. Referencing the specific manual for your remote ensures you understand all available features and can troubleshoot any issues effectively. Knowing your model unlocks the full potential of your Daikin system’s control capabilities.
Remote Control Parts Identification
Familiarizing yourself with the remote’s components is essential. Typically, you’ll find a power button for on/off control, directional buttons for navigating menus, and numerical keys for direct input. A display screen showcases the current settings – temperature, mode, and timer information. Mode buttons select cooling, heating, auto, or fan-only operation.
Dedicated buttons adjust fan speed (auto, low, medium, high) and control specialized features like energy-saving modes. The timer buttons enable setting schedules for automated operation. The ‘set/confirm’ button saves your selections. Understanding each part’s function streamlines operation and allows for precise control of your Daikin air conditioning system.
Button Functions: Power, Mode, Fan Speed
The Power button initiates or terminates air conditioner operation. The Mode button cycles through available settings: Auto adjusts automatically, Cool provides cooling, Heat delivers warmth, Dry reduces humidity, and Fan circulates air without temperature change. Pressing ‘Mode’ repeatedly selects your desired function.

Fan Speed buttons control airflow intensity. ‘Auto’ adjusts speed based on temperature, while Low, Medium, and High offer manual control. Experiment to find your comfort level. These buttons are central to customizing your environment. Proper use ensures efficient operation and personalized comfort. Remember to consult your specific model’s manual for detailed explanations.
Temperature Adjustment & Display
Temperature adjustment is achieved using the Up and Down arrow buttons on your Daikin remote. Each press typically alters the set temperature by one degree Fahrenheit or Celsius, depending on your unit’s setting. The display clearly shows the currently set temperature, alongside the selected operating mode and other active features.
The display also often indicates fan speed, timer status, and any error codes. Familiarize yourself with the display icons for quick troubleshooting. Some models feature a backlight for improved visibility in low-light conditions. Accurate temperature setting is crucial for comfort and energy efficiency. Regularly check the display to ensure desired settings are maintained.
Timer & Clock Settings
Timer functionality on your Daikin remote allows for automated operation, enhancing convenience and energy savings. You can set a timer to turn the unit on or off at specific times. The clock settings are essential for accurate timer operation; ensure the correct time and date are programmed into the remote.

Most models offer both an “On” timer and an “Off” timer, providing flexible scheduling options. Programming is typically done using dedicated timer buttons and the numeric keypad. Refer to your specific model’s manual for detailed instructions. Properly configured timers can significantly reduce energy consumption and maintain a comfortable environment.
Initial Setup & Pairing
Proper initial setup is crucial for seamless operation of your Daikin remote. This begins with installing batteries correctly, ensuring correct polarity (+ and -) for optimal performance. Next, pairing the remote with your air conditioner might be necessary, especially for newer models or after battery replacement.
Pairing typically involves pressing and holding specific buttons on both the remote and the air conditioning unit simultaneously. Consult your model’s manual for the exact procedure. Successful pairing establishes communication, allowing the remote to control the AC effectively. If pairing fails, repeat the process or check for obstructions.
Installing Batteries Correctly
Ensuring correct battery installation is paramount for your Daikin remote’s functionality. Typically, Daikin remotes require AAA or AA batteries – check your model’s specifications. Open the battery compartment, usually located on the remote’s back or bottom. Match the battery polarity (+ and -) with the markings inside the compartment. Incorrect insertion can damage the remote and void the warranty.
Use fresh, high-quality batteries for optimal performance. Avoid mixing old and new batteries, or different battery types. Securely close the battery compartment cover. If the remote doesn’t respond, double-check the battery installation and consider replacing the batteries even if they appear new.
Pairing the Remote with the Air Conditioner
Pairing establishes communication between your Daikin remote and air conditioner. While many remotes work immediately, some require pairing, especially after battery changes or replacements. Consult your specific model’s manual for precise instructions, as procedures vary. Generally, this involves pressing and holding a specific button combination on the remote – often the “Reset” or “Pairing” button – while simultaneously powering on the air conditioner.
The air conditioner may display a confirmation message or beep to indicate successful pairing. If pairing fails, repeat the process, ensuring you’re within close proximity to the unit. Refer to the troubleshooting section if issues persist.
Basic Operation: Cooling & Heating
Mastering cooling and heating with your Daikin remote is straightforward. Begin by powering on the air conditioner using the “Power” button. To adjust the temperature, utilize the “Up” and “Down” arrow buttons, observing the set temperature displayed on the remote screen. Select your desired operating mode – “Cool” for cooling, “Heat” for heating, “Auto” for automatic adjustment, “Dry” for dehumidification, or “Fan” for air circulation.
Ensure the fan speed is set to your preference using the “Fan Speed” button. Experiment with different modes and temperatures to achieve optimal comfort levels within your space.
Setting the Desired Temperature
Precise temperature control is at your fingertips with the Daikin remote; Use the clearly marked “Up” (▲) and “Down” (▼) arrow buttons to adjust the target temperature. The current set temperature will be prominently displayed on the remote’s LCD screen, allowing for easy monitoring. Each press of the button typically adjusts the temperature by one degree Fahrenheit or Celsius, depending on your unit’s setting.
Observe the room temperature and adjust accordingly to achieve your ideal comfort level. Remember that the air conditioner will work to reach the set temperature, not necessarily maintain it constantly.
Selecting Operating Modes (Auto, Cool, Heat, Dry, Fan)
Daikin remotes offer versatile operation modes to suit various needs. Press the “Mode” button repeatedly to cycle through the available options: “Auto,” “Cool,” “Heat,” “Dry,” and “Fan.” “Auto” intelligently selects the optimal mode based on room temperature. “Cool” provides cooling, while “Heat” delivers warmth. “Dry” reduces humidity, and “Fan” circulates air without temperature adjustment.
The currently selected mode will be indicated by a corresponding icon on the remote’s display. Choose the mode that best matches your desired climate control outcome for maximum comfort and efficiency.
Advanced Features & Functions
Daikin remotes unlock a suite of advanced features beyond basic temperature control. Explore “Energy Saving Mode” and “Eco Mode” to optimize power consumption without sacrificing comfort. “Good Night Sleep Mode” gradually adjusts temperature for a restful night, while “Comfort Mode” ensures gentle airflow.
Fine-tune your experience with precise “Fan Control,” selecting from “Auto,” “Low,” “Medium,” and “High” settings. These features enhance personalization and efficiency, allowing you to tailor your Daikin air conditioner’s performance to your specific preferences and environmental conditions.
Energy Saving Mode & Eco Mode
Daikin’s Energy Saving Mode intelligently adjusts cooling and heating output to minimize energy consumption while maintaining a comfortable environment. This mode subtly increases or decreases the set temperature, reducing strain on the unit. Eco Mode takes a more proactive approach, optimizing compressor speed and fan settings based on room occupancy and temperature fluctuations.
Both modes aim to lower electricity bills and reduce your carbon footprint. Utilizing these features is a simple yet effective way to enjoy climate control responsibly. Consult your specific model’s manual for detailed customization options within each mode.
Good Night Sleep Mode & Comfort Mode
Good Night Sleep Mode gradually adjusts the set temperature during the night, creating a more comfortable sleeping environment and conserving energy. It typically increases the temperature slightly during cooling or decreases it during heating, preventing discomfort from excessive temperature changes while you sleep. Comfort Mode prioritizes consistent temperature distribution, minimizing drafts and hot or cold spots within the room.
These features enhance overall comfort and well-being. Comfort Mode achieves this by subtly adjusting airflow and fan speed. Refer to your Daikin model’s manual for specific settings and customization options available within each mode.
Fan Control: Auto, Low, Medium, High
Daikin remote controls offer versatile fan speed settings to personalize your comfort. Auto mode intelligently adjusts fan speed based on the difference between the set and room temperatures, optimizing energy efficiency and maintaining consistent comfort. Low provides a gentle airflow, ideal for quiet operation and minimal disturbance. Medium offers a balanced airflow for general cooling or heating.
High delivers maximum airflow for rapid temperature adjustments. Experiment with these settings to find the perfect balance between comfort and energy savings. Some models may also include a ‘Jet’ or ‘Turbo’ fan speed for even faster cooling.
Troubleshooting Common Issues
Encountering problems with your Daikin remote? Don’t worry, many issues are easily resolved. If the remote isn’t responding, first check the batteries and ensure they’re installed correctly. Obstructions between the remote and air conditioner can also interfere with the signal. Display problems, like a blank screen or error codes, may indicate low batteries or a remote malfunction.
If the air conditioner ignores remote commands, try resetting both the unit and the remote. Refer to your specific model’s manual for error code definitions and further troubleshooting steps. A faulty remote may require replacement.
Remote Not Responding
Is your Daikin remote control failing to communicate with the air conditioner? The most common cause is depleted or incorrectly installed batteries. Begin by replacing the batteries with fresh ones, ensuring correct polarity (+ and -). Next, verify there’s a clear line of sight between the remote and the indoor unit’s receiver – obstructions can block the signal.
Try pointing the remote directly at the air conditioner from a closer distance. If the issue persists, attempt resetting the remote by removing the batteries for several minutes. A malfunctioning remote might necessitate a replacement; consider a universal remote as a temporary solution.
Display Problems & Error Codes
Encountering issues with your Daikin remote’s display or seeing error codes? A dim or blank display often indicates low batteries – replace them immediately. If the display is functional but shows an error code, consult your Daikin air conditioner’s main operation manual. These codes pinpoint specific system malfunctions, like refrigerant leaks or sensor failures.
Error codes are crucial for troubleshooting; note the code precisely. Some codes may resolve with a simple reset of the air conditioner. For persistent errors, or if you’re unsure about the meaning of a code, contact a qualified Daikin service technician for professional assistance and repair.
Air Conditioner Not Following Remote Commands
Is your Daikin AC ignoring your remote’s instructions? First, ensure a clear line of sight between the remote and the indoor unit’s receiver. Obstructions can interfere with the signal. Next, verify the remote’s batteries are fresh and correctly installed. Try pointing the remote directly at the AC unit from a closer distance.
If the problem persists, the remote might need re-pairing with the air conditioner (refer to the ‘Pairing the Remote’ section). Check for interference from other electronic devices. If none of these steps resolve the issue, a faulty remote or a problem with the AC’s receiver may require professional attention.
Replacing the Remote Control
Lost or broken your Daikin remote? Don’t worry, replacements are readily available! Begin by identifying your air conditioner’s model number – this is crucial for compatibility. You can find a compatible replacement through Daikin’s official website, authorized dealers, or online retailers specializing in HVAC parts.
Alternatively, consider a universal remote control programmed to work with Daikin units. Programming instructions are usually included with the universal remote. Ensure the universal remote supports the specific functions you require. Always verify the return policy before purchasing, just in case the replacement isn’t a perfect fit.
Finding a Compatible Replacement
Locating the correct Daikin remote replacement starts with your air conditioner’s model number, typically found on the unit itself or in your original documentation. Daikin’s official website is an excellent starting point, offering a parts finder tool. Authorized Daikin dealers can also assist in identifying the precise replacement.
Numerous online retailers specialize in HVAC components, providing a wide selection. When searching, use keywords like “Daikin remote BRC1D61” (or your specific model). Carefully review product descriptions and customer reviews to confirm compatibility. Prioritize sellers with clear return policies, ensuring a hassle-free experience if the remote doesn’t function correctly.
Programming a Universal Remote
Utilizing a universal remote offers a cost-effective alternative to a Daikin-specific replacement. Begin by identifying your air conditioner’s brand code, often listed in the universal remote’s manual or available online through the manufacturer’s website. Follow the remote’s programming instructions, typically involving entering the code and testing basic functions like power and volume (temperature).
If the initial code doesn’t work, systematically try other Daikin codes listed. Some universal remotes feature auto-search functionality, scanning through codes until a compatible one is found. Ensure the remote is in learning mode and pointed directly at the air conditioner during programming for optimal results.
Daikin Remote Control Apps (Smartphone Control)
Enhance your control with Daikin’s smartphone app, offering convenient operation from anywhere. These apps transform your mobile device into a virtual remote, mirroring most functions of the physical controller. Download the official Daikin app from the App Store (iOS) or Google Play Store (Android), ensuring compatibility with your specific air conditioner model.
Connection typically involves linking the app to your home’s Wi-Fi network and then pairing it with the air conditioner, often requiring the unit to be in pairing mode. Once connected, you can adjust settings, monitor energy usage, and schedule operations remotely, providing ultimate comfort and convenience.
Downloading & Installing the Daikin App
Begin by accessing your smartphone’s app store – the Apple App Store for iOS devices or the Google Play Store for Android. Search for “Daikin” or “Daikin Remote Control” to locate the official application. Carefully verify the publisher to ensure you’re downloading the legitimate Daikin app, avoiding potential security risks from imitation software.
Tap the “Install” button and allow the app to download and install on your device. The installation time will vary depending on your internet connection speed. Once installed, open the app and grant any requested permissions, such as location access (for initial setup) and notification access (for alerts).
Connecting the App to Your Air Conditioner
Initiate the connection process within the Daikin app. Typically, this involves selecting your air conditioner model from a list or allowing the app to automatically detect it on your home Wi-Fi network. Ensure your air conditioner is powered on and connected to the same Wi-Fi network as your smartphone.
The app may prompt you to enter your air conditioner’s serial number or a unique pairing code, often found on a sticker located on the unit itself. Follow the on-screen instructions carefully to complete the pairing process. Once connected, the app will display your air conditioner’s current status and allow remote control.
Cleaning & Maintenance
Regular cleaning extends the life of your Daikin remote. Use a soft, dry cloth to wipe the surface, removing dust and fingerprints. Avoid using abrasive cleaners or solvents, as these can damage the buttons and display. For stubborn dirt, lightly dampen the cloth with water, ensuring it’s not dripping wet.
Battery replacement is crucial for consistent operation. Replace batteries when the display becomes dim or the remote stops responding. Follow the polarity markings (+/-) inside the battery compartment. A recommended schedule is every six to twelve months, depending on usage. Proper maintenance ensures reliable control of your Daikin air conditioner.
Cleaning the Remote Control Surface
Maintaining a clean remote is simple yet vital. Begin by removing the batteries to prevent accidental button presses during cleaning. Use a soft, lint-free cloth – microfiber is ideal – to gently wipe down the entire surface. Avoid harsh chemicals, abrasive cleaners, or excessive moisture, as these can damage the plastic casing and internal components.
For stubborn grime, lightly dampen the cloth with distilled water, ensuring it’s wrung out thoroughly. Pay attention to the buttons and crevices, carefully removing any accumulated dust or debris. After cleaning, dry the remote completely before reinserting the batteries. Regular cleaning ensures optimal performance and hygiene.
Battery Replacement Schedule
Proactive battery replacement prevents unexpected remote failures. Daikin remotes typically use AAA or AA batteries, depending on the model. A general guideline is to replace batteries every 6-12 months, but usage frequency significantly impacts lifespan. If you notice diminished range, sluggish response times, or a fading display, it’s time for fresh batteries.
Consider using high-quality alkaline batteries for extended performance. Avoid mixing old and new batteries, and always replace all batteries simultaneously. Regularly check the battery compartment for any signs of corrosion and clean if necessary. Keeping spare batteries on hand ensures uninterrupted control of your Daikin air conditioning system.
Specific Model Manuals (BRC1D61, etc.)
Daikin offers a variety of remote control models, each with unique features and functionalities. The BRC1D61 is a popular choice, offering comprehensive control over your air conditioning system. Other models, like the BRC230B51, cater to specific Daikin unit types. Accessing the correct manual is crucial for understanding your remote’s capabilities.
Locate your remote’s model number – usually found on the back or inside the battery compartment. Daikin’s official website provides downloadable PDF manuals for numerous models. These manuals detail specific button functions, advanced settings, and troubleshooting steps tailored to your particular remote control. Ensure you have the correct manual for optimal usage.
Safety Precautions
Always prioritize safety when using your Daikin remote control. Avoid exposing the remote to excessive moisture or direct sunlight, as this can damage internal components. Never disassemble the remote, as it contains no user-serviceable parts. Incorrect battery installation can lead to leakage and potential corrosion, so follow the polarity markings carefully.
Keep the remote out of reach of small children to prevent accidental ingestion of batteries or damage to the unit. Do not drop or impact the remote, as this may affect its functionality. If the remote malfunctions, discontinue use and consult the troubleshooting section or contact Daikin support for assistance.
Where to Find Official Daikin Manuals Online
Accessing official Daikin resources is crucial for accurate information. Begin your search at the official Daikin website, navigating to the “Support” or “Downloads” section. Here, you can typically filter by product type and model number to locate the correct manual. Many Daikin distributors also host manuals on their websites, offering convenient access.
Explore online databases dedicated to appliance manuals, often containing a comprehensive archive of Daikin documentation, including the BRC1D61. Remember to verify the source’s legitimacy to ensure you’re downloading a genuine Daikin manual. Direct links are often available through Daikin’s customer support channels.
Frequently Asked Questions (FAQ)
Q: Why isn’t my remote working? Ensure fresh batteries are correctly installed and there’s no obstruction between the remote and the AC unit. Q: How do I reset the remote? Removing the batteries for a few minutes often resolves minor glitches. Q: Can I use a universal remote? Yes, but programming is required, and full functionality isn’t always guaranteed.
Q: Where can I find my model number? It’s usually located on the back of the remote or the indoor unit. Q: What do error codes mean? Consult your manual for specific code definitions. Q: Is there a smartphone app? Daikin offers apps for remote control – see the dedicated section!
Warranty Information for Daikin Remotes
Daikin remote controls typically carry a one-year limited warranty from the date of purchase, covering manufacturing defects in materials and workmanship. This warranty doesn’t cover damage from misuse, accidents, or unauthorized repairs. Proof of purchase is essential for any warranty claim.
To initiate a claim, contact your local Daikin dealer or Daikin’s customer support. The warranty may be void if non-Daikin parts are used for repairs. Extended warranties might be available through select retailers. Always retain your original purchase receipt and the remote’s model number for efficient processing.