Polycom HD Voice delivers remarkably clear and natural audio, enhancing communication experiences. These phones utilize advanced technology for superior voice quality,
reducing listener fatigue and improving overall call clarity.
What is HD Voice?
HD Voice, or High-Definition Voice, represents a significant leap forward in voice call technology. Unlike traditional phone calls that utilize a narrow bandwidth, HD Voice employs a wider frequency range – specifically, a sampling rate of 16 kHz and beyond. This broader bandwidth captures more of the nuances of the human voice, resulting in richer, clearer, and more natural-sounding conversations.
Polycom phones are engineered to support these HD Voice codecs, ensuring that users experience the full benefits. Essentially, HD Voice aims to replicate a face-to-face conversation more accurately over the phone, minimizing distortion and maximizing intelligibility. It requires compatible networks and devices on both ends of the call to function optimally.
Benefits of Using Polycom HD Voice
Polycom HD Voice offers numerous advantages for both individuals and businesses. The enhanced clarity reduces listening fatigue, leading to more productive and comfortable calls, especially during extended conversations. Improved voice quality minimizes misunderstandings, streamlining communication and reducing errors.
For businesses, HD Voice translates to a more professional image and improved customer satisfaction. Clearer communication with clients builds trust and strengthens relationships. Furthermore, the technology can enhance collaboration among teams, fostering better understanding and efficiency. Ultimately, Polycom HD Voice isn’t just about better sound; it’s about better communication and improved business outcomes.

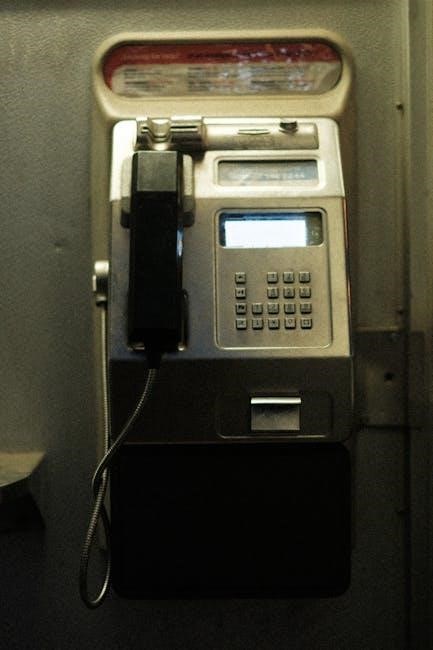
Understanding Your Polycom Phone Model
Polycom phones come in various models, each with unique features. Identifying your specific model is crucial for accessing the correct documentation and support resources.
Identifying Your Specific Polycom Phone
Determining your exact Polycom phone model is the first step towards effective troubleshooting and configuration. Look for a label typically located on the underside of the phone or within the battery compartment. This label will contain the model number, often a combination of letters and numbers (e.g., VVX 310, IP 560).
Once you have the model number, you can access Polycom’s support website or your VoIP provider’s documentation to find the specific user manual and configuration guides for your device. Knowing your model ensures you’re applying the correct procedures and accessing relevant features. Incorrect procedures can lead to functionality issues, so accurate identification is paramount.
Key Features and Components
Polycom phones boast several key features, including HD Voice quality, a user-friendly interface, and robust security protocols. Common components include a handset, speakerphone, display screen (often color), multiple programmable line/feature keys, and Ethernet ports for network connectivity – often dual 10/100 ports supporting Power over Ethernet (PoE).
Many models also feature a USB port for connecting accessories like headsets. Understanding these components is crucial for setup and troubleshooting. The display screen provides access to menus and settings, while the line keys allow for quick access to frequently used features. Proper utilization of these features enhances the overall communication experience.

Initial Setup and Configuration
Proper setup involves connecting the Polycom phone to your network via Ethernet, activating it on your VoIP system, and configuring basic settings for optimal performance.
Connecting Your Polycom Phone to the Network
Establishing a stable network connection is crucial for Polycom HD Voice phone functionality. Begin by physically connecting your phone to the network using an Ethernet cable. Polycom phones typically feature dual 10/100 Ethernet ports; utilize Power over Ethernet (PoE) if your network switch supports it, simplifying power requirements.
Ensure the cable is securely plugged into both the phone and the network port. After connecting, allow the phone to boot up. Verify the connection by checking the network status within the phone’s menu (usually found under Status > Network). Confirm that the phone obtains a valid IP address, subnet mask, and gateway from your DHCP server. A wired connection is generally recommended for consistent call quality.
Activating Your Phone on the VoIP System
Once physically connected, your Polycom phone needs activation on your VoIP system. This process typically involves provisioning – automatically configuring the phone with the necessary settings from your VoIP provider’s server. Your provider will supply specific instructions, often involving a URL or a provisioning token.
Enter this information into the phone’s web interface (accessible via its IP address in a web browser) or through the phone’s menu system. The phone will then download its configuration file, including extensions, passwords, and codec settings. Successful provisioning is indicated by the phone registering with the VoIP server. If activation fails, double-check the provisioning URL and credentials with your VoIP provider for accuracy.
Basic Phone Settings Configuration
After activation, configure basic settings via the phone’s menu. Access “Settings” then navigate to options like Date/Time, ensuring accuracy for call logs and voicemail timestamps. Adjust the volume levels for handset, headset, and speaker to your preference; Configure the display settings – brightness and screen saver – for optimal visibility.
Customize the soft keys to frequently used functions for quick access; Explore ringtone options to personalize incoming call alerts. Importantly, verify the correct date and time settings, as these impact voicemail functionality. Save all changes and test the settings by making a test call to confirm proper operation. Refer to your VoIP provider for specific setting recommendations.

Troubleshooting Common Issues
Common problems include no dial tone, poor audio, one-way audio, and automatic restart prompts. Simple fixes often involve checking connections and power cycling the device.
No Dial Tone
Experiencing no dial tone on your Polycom HD Voice phone can be frustrating, but several quick checks can resolve the issue. First, verify the physical connection – ensure the Ethernet cable is securely plugged into both the phone and the network port. Confirm the cable isn’t damaged.
Next, check power; if using Power over Ethernet (PoE), confirm PoE is enabled on the switch port. If using a separate power adapter, ensure it’s properly connected and functioning. Access the phone’s menu (often via a “Settings” or “Status” button) and verify it has obtained an IP address.
If no IP address is present, there’s a network connectivity problem. Finally, a simple reboot – unplugging the phone for 30 seconds and plugging it back in – often resolves temporary glitches. If the problem persists, contact your VoIP provider.
Poor Audio Quality
Poor audio quality on your Polycom HD Voice phone can stem from various sources. Begin by checking the physical headset or handset – ensure it’s securely connected and free from damage. Test with an alternate headset to isolate the issue. Next, investigate network connectivity; a weak or unstable connection significantly impacts VoIP call quality.
Verify the Ethernet cable is secure and undamaged. Access the phone’s network status menu to confirm a stable IP address and connection. Consider potential interference from other devices on the network. Your VoIP provider’s Network Operations Center (NOC) can analyze call examples to pinpoint network-related problems.
Finally, ensure the phone’s firmware is up-to-date, as updates often include audio quality enhancements. A reboot can also resolve temporary software glitches affecting audio processing.

One-Way Audio (Can’t Hear or Be Heard)
One-way audio issues – either you can’t hear the caller or they can’t hear you – are common Polycom HD Voice phone problems. First, confirm the microphone isn’t muted on your phone or within any connected applications like the Polycom Desktop Connector. Check the volume levels on both your phone and the headset, if applicable.
Next, verify network connectivity. A poor connection can cause packet loss, resulting in audio dropouts or complete silence. Test with an alternate handset to determine if the issue lies with the original handset itself. If the problem persists, disabling the Polycom Desktop Connector can sometimes resolve conflicts.
Finally, ensure your voicemail number is correctly programmed, as incorrect settings can occasionally interfere with audio pathways. A phone restart is also a quick troubleshooting step.
Automatic Voice Prompt: “Restart Your Phone”
Hearing an automated voice prompt instructing you to restart your Polycom HD Voice phone indicates the system has detected an internal error requiring a reboot. This is often a temporary glitch, and a simple restart usually resolves the issue. Unplug the phone from the power source (or Ethernet cable if using Power over Ethernet ⎯ PoE) and wait a full 30 seconds before plugging it back in.
If the prompt persists after restarting, verify your network connection. Ensure the phone is securely connected via Ethernet. Check the IP address assigned to the phone to confirm it’s receiving a valid network configuration. Disabling the Polycom Desktop Connector can also prevent conflicts that trigger this message.
Call Forwarding Problems
Experiencing issues with call forwarding on your Polycom HD Voice phone can be frustrating. First, double-check if the ‘Do Not Disturb’ (DND) feature is enabled, as this will block all forwarding attempts. Next, meticulously verify that the voicemail number is correctly programmed into the phone’s settings; an incorrect number will prevent successful forwarding to voicemail.
A simple phone restart can often resolve temporary software glitches affecting forwarding functionality; If problems persist, confirm that your VoIP provider supports call forwarding with your specific Polycom model. Ensure the forwarding rules are correctly configured within your VoIP system’s portal, not just on the phone itself.

Advanced Troubleshooting
Advanced diagnostics involve checking network connectivity, verifying IP settings, disabling Polycom Desktop Connector, and testing with an alternate handset to isolate issues.
Checking Network Connectivity (Ethernet & PoE)
Ensuring a stable network connection is paramount for Polycom HD Voice phone functionality. Begin by verifying the Ethernet cable is securely connected to both the phone and the network switch or wall jack. Utilize the dual 10/100 ports if available, prioritizing a direct connection over wireless.
If Power over Ethernet (PoE) is employed, confirm the switch supports PoE and is actively delivering power to the phone. A lack of sufficient power can cause intermittent issues. Check the phone’s network status menu to confirm it has obtained an IP address. If no IP address is present, investigate potential network configuration problems or cabling faults. A faulty cable or switch port can easily disrupt connectivity.
Verifying IP Address and Network Settings
Accessing the phone’s menu (typically through the settings or options button) allows you to view its current IP address, subnet mask, gateway, and DNS server settings. Confirm the IP address is within the expected range for your network. An incorrect IP address, or one outside the DHCP scope, will prevent communication.
Verify the subnet mask and gateway are correctly configured to match your network infrastructure. Incorrect settings will hinder the phone’s ability to reach the VoIP system. Ensure the DNS server addresses are valid and capable of resolving the VoIP provider’s domain name. If settings appear incorrect, consult your network administrator or VoIP provider for the proper configuration values.
Disabling Polycom Desktop Connector
The Polycom Desktop Connector, when active, can sometimes interfere with standard phone operation, causing unexpected behavior or conflicts. To disable it, navigate to the settings menu on your Polycom phone. Look for options related to USB or PC connectivity.
Within these settings, you should find a toggle or option to disable the Desktop Connector functionality. Deactivating this feature ensures the phone operates independently, relying solely on the network connection for VoIP calls. After disabling, restart the phone to apply the changes. This often resolves issues related to call quality or unexpected prompts, allowing for a more stable connection.
Testing with an Alternate Handset
If troubleshooting steps haven’t resolved the issue, testing with a known working Polycom handset is crucial for isolating the problem. Connect a different, confirmed functional handset to the same network port and extension. This helps determine if the issue lies with the original handset itself or with the phone’s configuration or network connectivity.
If the alternate handset functions correctly, it strongly suggests a hardware fault within the original handset. Conversely, if the problem persists with the alternate handset, the issue likely resides within the phone’s software, network settings, or the VoIP system itself. If neither handset works, contact support.

Call Quality Optimization
Optimizing call quality involves analyzing network conditions, verifying proper voicemail programming, and checking for features like Do Not Disturb that might impact connectivity.
Understanding Voice-over-IP (VoIP) Issues
VoIP call quality can be affected by several factors, differing from traditional phone lines. Network congestion, packet loss, and latency are common culprits, leading to choppy audio or dropped calls. Bandwidth limitations also play a crucial role; HD Voice requires sufficient bandwidth for optimal performance.
Firewall configurations can sometimes block VoIP traffic, hindering connectivity. Codec mismatches between devices can also cause audio distortion. Furthermore, inconsistent internet connections, whether wired or wireless, introduce instability.
Granite’s Network Operations Center (NOC) provides valuable insights into these issues, analyzing call examples to pinpoint the root cause of poor audio quality and network performance.
Analyzing Call Examples with Network Operations Center (NOC)
The Network Operations Center (NOC) offers a powerful toolset for diagnosing VoIP call quality problems. Every call made on the network is meticulously recorded, providing a comprehensive view of call performance. NOC technicians can analyze these call examples to identify specific issues like packet loss, jitter, and latency.
Detailed metrics reveal network bottlenecks and potential points of failure. This granular data allows for precise troubleshooting, pinpointing whether the problem lies within the network infrastructure, the VoIP provider’s network, or even the end-user’s local connection.
By examining call paths and associated data, the NOC can quickly resolve issues and restore optimal call quality for Polycom HD Voice users.
Checking Do Not Disturb Status
Do Not Disturb (DND) is a common cause of unexpected call forwarding behavior. If DND is enabled on a Polycom phone, all incoming calls will be automatically diverted, potentially leading to the belief that call forwarding isn’t functioning correctly.
Users can easily verify their DND status directly on the phone’s interface, typically found within the settings menu. Disabling DND will immediately restore normal call handling. It’s crucial to confirm DND is off before investigating more complex forwarding issues.
A simple restart of the phone can also sometimes resolve unexpected DND activation, ensuring calls are routed as intended.
Verifying Voicemail Number Programming
Incorrect voicemail number programming is a frequent cause of call forwarding problems. If the voicemail number is incorrectly configured on the Polycom phone, calls intended for voicemail may fail to forward, or be sent to the wrong destination.
Users should access the phone’s settings menu to verify the programmed voicemail number. This number must precisely match the voicemail system’s access number provided by their VoIP provider. Double-check for any typos or incorrect digits.
Contacting your VoIP provider to confirm the correct voicemail number is recommended, ensuring accurate configuration and proper call forwarding to voicemail.
Resetting Your Polycom Phone
Polycom phones offer both soft and factory reset options. A soft reset restarts the phone, while a factory reset restores it to its original settings.
Soft Reset vs. Factory Reset
Understanding the difference between a soft reset and a factory reset is crucial for Polycom phone maintenance. A soft reset is akin to rebooting a computer; it restarts the phone’s operating system, clearing temporary files and resolving minor glitches without affecting personalized settings like call forwarding or saved contacts.
Conversely, a factory reset restores the phone to its original, out-of-the-box condition. This process erases all custom configurations, including network settings, user profiles, and any downloaded applications. It’s a more drastic measure typically reserved for resolving persistent issues or preparing the phone for a new user. Caution: Performing a factory reset will require complete reconfiguration of the device.
Performing a Factory Reset (Caution!)
Caution! A factory reset will erase all personalized settings on your Polycom phone. Before proceeding, document your current network configuration and any custom settings, such as call forwarding numbers or user preferences. Access the phone’s settings menu – typically through a web interface or on-screen options – and locate the “Factory Reset” or “Reset to Defaults” option.
Confirm your decision, as this action is irreversible without restoring from a backup (if available). The phone will reboot, returning to its original factory state. You will then need to reconfigure the phone entirely, including network settings, user accounts, and any desired features. Ensure a stable network connection is available during this process to avoid interruptions.

Where to Find Further Support
For detailed assistance, visit the official Polycom support website or contact your VoIP provider directly for specific troubleshooting and account support.
Polycom Support Website
The Polycom support website is a comprehensive resource for resolving issues with your HD Voice phone. It features an extensive knowledge base filled with articles, FAQs, and troubleshooting guides covering a wide range of topics. You can often find solutions to common problems by searching for specific error messages or symptoms.
The website also provides access to software and firmware updates, which can improve phone performance and address known bugs. Downloadable user manuals and technical documentation are readily available for most Polycom phone models. Furthermore, the Polycom support portal offers options for submitting support tickets and contacting technical support representatives directly for personalized assistance. Be prepared to have your phone model and serial number available when contacting support.
Contacting Your VoIP Provider
If you’ve exhausted troubleshooting steps and are still experiencing issues with your Polycom HD Voice phone, contacting your VoIP provider is crucial. They manage the underlying service that enables your phone to function, and many problems originate within their network infrastructure.
Your provider can verify account provisioning, check for service outages, and assist with network-related configurations. Be prepared to provide details about the issue, including any error messages, the time the problem started, and steps you’ve already taken. They may also request your phone’s MAC address or IP address for diagnostic purposes. Remember, they are your primary point of contact for service-level issues impacting call quality or connectivity.